When you choose Mammoth Surfaces, you’re not just picking a floor coating—you’re picking a process that’s been tested, proven, and built to last. We believe in transparency, so let’s walk you through exactly what happens when our crew shows up at your home.
WHY WE SHARE THIS
We know choosing a floor coating can feel overwhelming, especially when every company claims to be the best. That’s why we want you to see exactly what goes into a Mammoth installation. It’s not just a product—it’s a process. And that process is what gives you a floor that’s built to last.
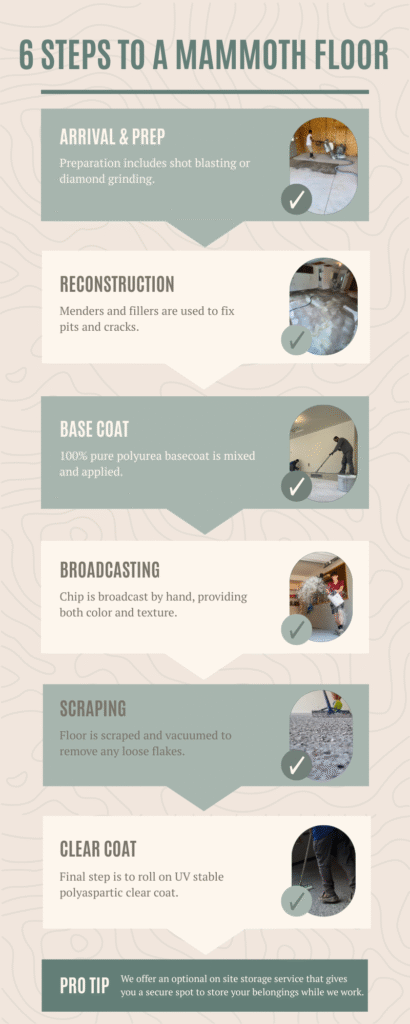
STEP 1: PREPARATION
We start by giving your concrete a fresh canvas. Using shot blasting or diamond grinding, we open up the pores of the concrete and remove old coatings, stains, or imperfections. This step ensures the new coating bonds permanently to your floor.
STEP 2: RECONSTRUCTION
Next, we tackle any cracks, pits, or uneven spots. Mendering and filling with professional polyurea blends, we repair the surface so it’s smooth, level, and ready for the next layer. A strong floor starts with a strong foundation.
STEP 3: BASE COAT
Here’s where the transformation really begins. We mix and apply a 100% pure polyurea base coat. Unlike standard epoxy, polyurea penetrates deep into the concrete, creating a flexible, permanent bond that won’t peel or lift.
STEP 4: BROADCASTING
While the base coat is still wet, we hand-broadcast decorative vinyl paint flakes across the surface. This step adds both color, texture, and durability, giving your floor that custom Mammoth look you selected.
STEP 5: SCRAPING
Once the base coat and flakes have cured, we scrape, vacuum, and blow off the floor to remove any loose flakes. This creates a smooth, consistent finish—no rough edges, just a clean surface ready for sealing.
STEP 6: CLEAR COAT
The final step is squeegee and backrolling on a UV-stable polyaspartic clear coat. This seals in the flakes, adds a glossy finish, and provides unmatched durability against sun, spills, and everyday wear and tear.
COMMON QUESTIONS WE HEAR
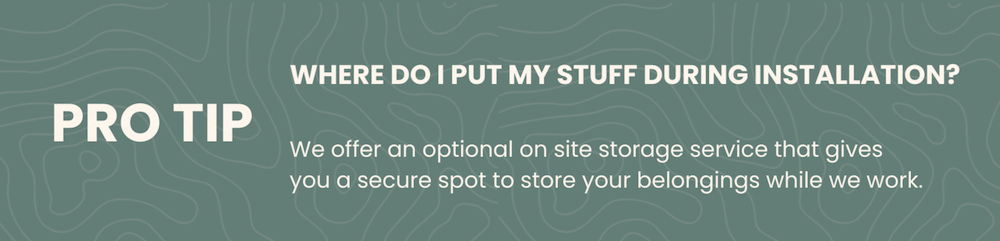
Where do I put my stuff during installation?
We offer an optional on site storage service that gives you a secure spot to store your belongings while we work.
How Long Does It Take?
Most Mammoth installations are completed in just one day. Larger jobs may take two, but our process is designed for efficiency without ever cutting corners.
Will it be messy?
Our shot blasters and grinders are paired with vacuum systems to minimize dust, and we protect surrounding surfaces before we start.
When can I use my garage again?
You’ll be able to walk on it in 24 hours. Vehicles can return after 48–72 hours.
How do I care for my new floor?
Keep your coating looking great with regular care. Sweep weekly, rinse with a hose and squeegee dry every 2–3 weeks, and do a deep clean every 3 months using hot water and a mild detergent like CLR, Simple Green, or Dawn. Scrub the surface, rinse well, and squeegee it dry.
READY TO GET STARTED?
👉 Schedule your free estimate today and let’s transform your space with a Mammoth floor.